enJOY it

an archived personal and craft blog from Elise Blaha Cripe.

  • IMG_1378 Paul and I just started watching Mad Men. I have a love/hate relationship with nearly every character. I'll watch forever though because the writing is great, the costumes are perfection and I am so intrigued that they are not making something from nothing, but instead taking what exists (the era) and writing a story around it. Pretty fantastic.

    One of my favorite lines came from towards the end of season one was when Don Draper told Peggy Olsen who was having a mental block to think about it for a long time, then forget about it and the answer will come out of the blue.

    I'm doing that to try to figure out what my next project should be.

    Have a great weekend.

  • IMG_2474 building projects for the workshop

    IMG_2480 framing new photos…

    re-designing the blog…

    acting as a middleman for some pretty cool giveaways

    IMG_2485 reading two books…

    struggling over quantities to order of some new greeting cards for the shop

    IMG_2486 trying to ignore the last few cookies…

    waiting for Project Runway to start & my man to come home.

  • Currently :

    25 To Do book + see my list of goals to complete during the year here. This is the start of my book charting the process. Progress on my goals and the book will be shown here.

    Summer mini book + see the start of mine here. I will be sharing this book’s progress during summer 2010.

    Project Monday + I do my best to post new projects every Monday. The archives can be seen here.

    Past Projects :

    Wedding Plans + I got married in Sacramento, California in April 2010. I made all the paper products and the flowers as well. Here is a collection of wedding themed posts.

    24 To Do book + When I turned 24 in February 2009, I came up with a
    list
    of 24 things to do before my next birthday. The last item on
    the list is to document my progress. I made a blank book with 24 pages –
    one for each list item. You can see the blank book here and
    follow the documentation process here. If
    you are interested, I am taking orders for custom
    blank birthday books.

    See more information here.

  • Borabora A few months ago, I posted that we had grand plans for a honeymoon in Europe. Then a few weeks ago, I thought about the reality of going to Europe for a honeymoon. While I had a vision of a very relaxed, do nothing, eat good food, drink good wine vacation, the massive guidebooks for Northern Italy/Southern France told a different tale. [Don't get me wrong : They sound AMAZING and I hope sometime we are lucky enough to go and visit. It's just not right for us for this trip.]

    We switched gears and are going to … Bora Bora. Technically, they speak French there. And we will need passports and new currency. But our itinerary will be SIT AND DO NOTHING, followed by a little wine and drinks with umbrellas in them. The deposit went in yesterday so this is the real deal. We are staying in an overwater bungalow which means we can slide open our coffee table and feed REAL FISH below us. (As I was reading the room features, Paul scoffed at this one. Apparently we will not be feeding real fish but we will be jumping off our balcony into real water.)

    One of the best parts is that we are going to fly to west to Bora Bora the day after the wedding. We have a JAM PACKED month of May and we were originally going to wait until after Paul's med school graduation on May 14th to fly to Europe. Then we were going to come back, move all our stuff across the country and find a place to live in where ever Paul gets assigned for internship. Now we can get married, honeymoon, graduate and then move. It flows a tiny bit better? Maybe? I don't know. It's a wild confusing ride and I just want to map it all out in sharpie in my planner, but can't yet because we don't know what state will be home yet. Oh well. Worse comes to worst, we'll just refuse to move out of the bungalow.

    IMG_2448 
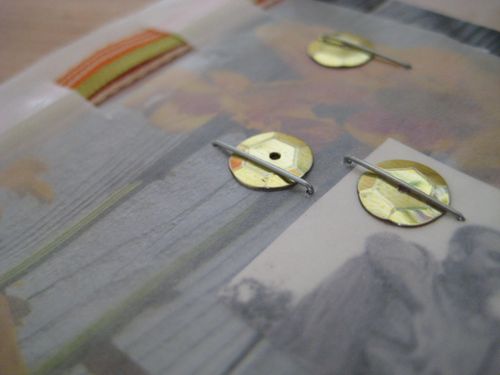
My second wedding thought involves our printed paper materials. I just found out that rental rates at the letterpress place I go to have gone up significantly.  Higher rates + an increasingly finicky press make for NOT A GOOD SITUATION. Right now, I am slowly backing away from letterpress printing, (except that I have one more kit planned for fall) but I am definitely on the lookout for a small press in working condition to buy.

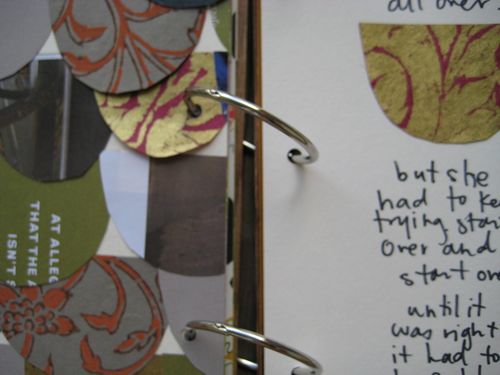
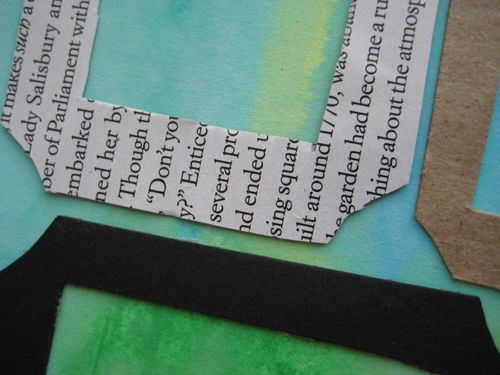
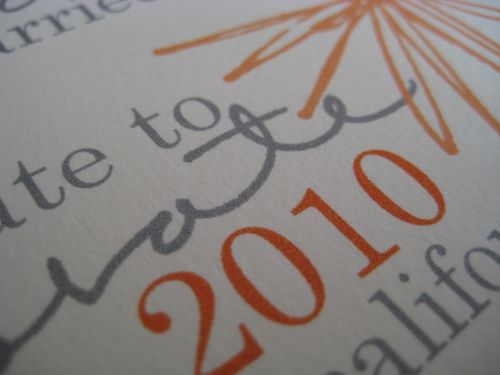
    Originally, I had big plans to letterpress save the dates AND invites. Yesterday, I did a test run on my home printer with cream Arturo paper and I am definitely going to stick with just that for save the dates. For one, the quality is great. For two, I can get them DONE AND OUT THE DOOR with little to no stress and expense. And for three, I can now (easily) incorporate three colors of ink.

    Jury is still out on whether or not I will letterpress the invites. We'll see how I feel in January. And by "how I feel", I mean, "we'll see if a letterpress has fallen out of the sky and landed on my doorstep."

    Happy Wednesday.

  • IMG_2451IMG_2453 THANK YOU for all the nice comments about the book. At the suggestion of Josie, I raced to the container store this afternoon and bought two more albums. At first I was like, “lime green, Elise, really?” And then I remembered we’re doing a whole bachelorette weekend. And FOR SURE lime green will work for that. And I got blue for the honeymoon. I was really hoping for the charcoal color but they were out of stock. Next time.

    Wedding Wednesday post tomorrow and then the Wedding Story will end for a while. It tends to rain and then pour a bit around here – thanks for understanding. Love.

  • IMG_2416IMG_2417 I love how this book turned out. I finished it last night and immediately googled to find out where I can buy more of these little mini binders. I am going to make similar albums for the wedding and honeymoon. And then someday I'll have little kids and they'll get little books too.

    Binderbefore When I bought the album it looked like this. Orange cloth on the the outside and a gray and white decorative paper on the inside. Cool, but not perfect.

    IMG_2420 I trimmed paper to the correct size (about 7×9 inches) and adhered it to the inside using double sided tape.

    All of my pages were created in Photoshop Elements. I created 6.75×8.5 canvases (? – can't think of the right word) with 300 dpi and played with the photos until I was happy with the results. I enlarged photos when I thought they looked good and did not worry about including every photo. I just picked my favorites and moved on.

    IMG_2421 IMG_2422 IMG_2423 IMG_2424 IMG_2425 IMG_2426 IMG_2427 IMG_2428 IMG_2429 IMG_2430 IMG_2431 IMG_2432 IMG_2433 IMG_2434 IMG_2435 IMG_2436 IMG_2437 IMG_2438 IMG_2439 As I mentioned yesterday, I decided to print each page at home. I have an HP Photosmart 2575. I am hesitant to even link it though because it looks like reviews on amazon are just TERRIBLE. I think someone even said, "WORST PRINTER EVER." Hmm. Mixed reviews much? I AM A HUGE FAN. The photo quality is just fantastic. I also want to note that while it's hard to measure exactly how much ink was used, I think all 38 pages took about 40% of a color cartridge. Not bad at all considering how great the images look in real life.

    IMG_2442 I printed the pages on semi-gloss Office Depot brand professional photo paper. I don't have much to say about the paper except that it was on sale. It's very thick and obviously semi-gloss which is good for me. I don't like glossy photos, just matte. The pages were 8.5×11 and I trimmed them down to 6.75×8.5 using this Fiskars paper cutter. Looks like more mixed reviews on this one – but again, I love it.

    I spread the pages out on the floor in the order I wanted them to appear in the book and then used a tape runner around the edges to adhere them back to back. The book now has super thick pages and is probably a little too full for the small binder rings.

    IMG_2446 Because the book is so simple, I kept the cover simple. I had a chipboard ampersand that I covered with white embossing powder and heat embossed. (The ampersand was originally green.) I stuck it to the front with the tape runner as well.

    I really loved the (super simple) digital scrapbooking route. I am already trying to figure out something else to do now. The wedding seems much to far away.

    photos IN the book by the fantastic Lisa Welge.

  • Promonaug17

    EngagedStoryboardEnd

    On Friday, our engagement images arrived on a CD. Ninety-three high-res images. I think my little computer wanted to explode. I work with a very little camera and very little resolution. Now that I have seen the difference (and improvement) I am not sure how to go back.

    For the past couple weeks, I have been trying to come up with the best way to display the photos in book form. I have had a small (7×9 inch) 3-ring binder sitting around for awhile, and I figured it would be perfect. I purchased a lot of orange, gray and cream card stock to use as the background for simple scrapbook pages. But once I got the actual images and started playing around in Photoshop Elements, I decided to keep the whole book digital. Two page spreads with only the photos, white space & Helvetica in orange and gray. 

    I wasn't sure quite the best way to incorporate text into the book and it ended up being a little random. A few spreads have "stories" – little anecdotes that I remember from the photo shoot. Other photos have just a short sentence accompanying them. In the end, it sort of became a letter to Paul. I called him "you" throughout the whole book. The storyboard is what you see above, it's 38 pages.

    I contemplated having the pages all printed and bound through a service like blurb, but after a test print of the first page I knew I would do it all at home. The combination of my printer and Lisa's photos is just perfect and I really do love that little orange binder.

    Tomorrow, I will share the printed out pages as well as how I am going to house them all in the album. I will also talk about photo paper, adhesive and the only printer you will ever need for the rest of your life.

    photos by Lisa Welge

  • Promo I spent the better part of the weekend building the new workshop blog, crafting (and re-crafting) projects and making lists upon lists. This workshop will be different than "Get Crafty" which I ran in April and again in June. For one, it will be a little bit slower pace – we are stretching the class time from two weeks to four which means there is more time to breath and reflect on ideas and projects.

    Last workshop also worked on a fairy strict format : four posts each weekday – a lecture, an idea to try, an idea to keep in mind and a daily project. This workshop will be more relaxed. Posts will serve as inspiration points and idea jump starts. There will also be several step-by-step tutorials : many art journal pages and (at least) two completely new art journal minibooks. I have been working on two new binding techniques that I haven't shared yet for these books.

    Below are a few sneaks peeks of projects that I have already put together. These next two weeks, I will be getting more projects in place. During the month of September, more projects will develop that will be woven into the class as well.

    IMG_2375 IMG_2374 IMG_2383 IMG_2390 IMG_2396 IMG_2411 IMG_2412

    You will be able to share you work in the class flickr group and "discussion" will take place in the comments section – newly improved with reply function (ha!). I am thinking about opening up some sort of message board, but I don't know how much interest there is for something like that.

    Towards the end of the class, PDFs of the class projects will be provided.

    If you are ready to sign up please go to the workshop page where you will be prompted to pay with paypal. Class cost is $15. Expect a welcome email with class information & password within 24 hours. Sign-ups will be open until Sept 4th. Questions? Please ask in the comments & I will respond there as well.

    And it's not all workshop, all the time. Check back later for Project Monday : my engagement album.

  • Picture 1 I am carefully working my way through them and laying out pages for what looks like will be an all digital engagement scrapbook. Love love love how the orange, gray, green & white are fitting together.

    I hope you are having a great weekend – busy week starts Monday, lots of giveaways, projects + workshop sign ups.