enJOY it

an archived personal and craft blog from Elise Blaha Cripe.

  • Blogview
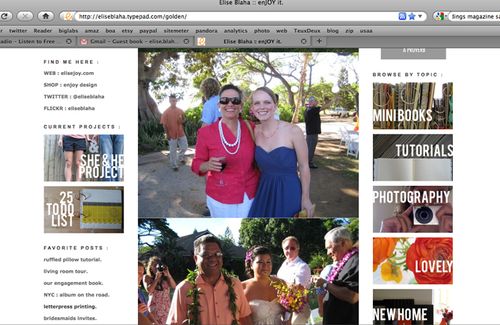
    I recently added buttons to the right sidebar that denote blog categories. I am in the process of going through 4.5 years of archives to get everything sorted. Hopefully this will make searching for past projects easier!

    I got an email about how I made the photo buttons and this quick tutorial shows the process. Keep in mind, this works for typepad. I am not sure of the exact process for other blog platforms, but the web coding should be the same.

    FIRST : Make your buttons in photoshop. Mine are 170×100 pixels. Save each button as a ".jpg".

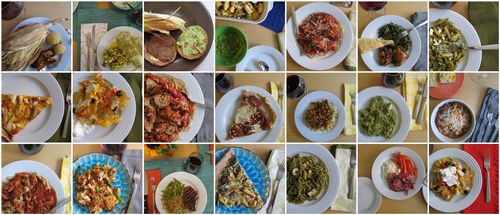
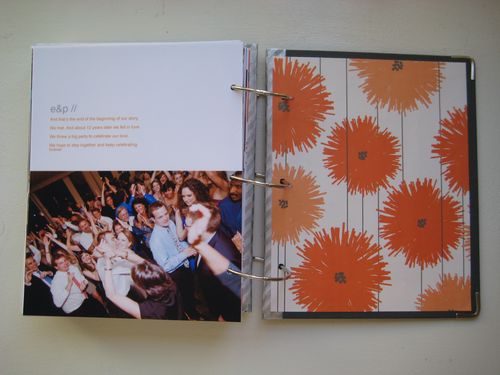
    I wanted my buttons to be consistent so I kept them all with a photo background (that related to the category) and then used bebas font in white with the category name.

    Filemanager

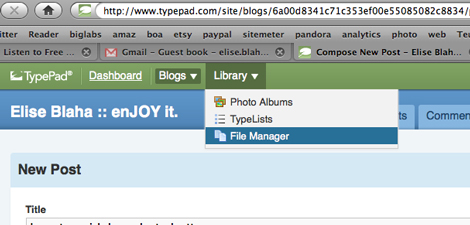
    SECOND : Upload your button images into typepad through the file manager.

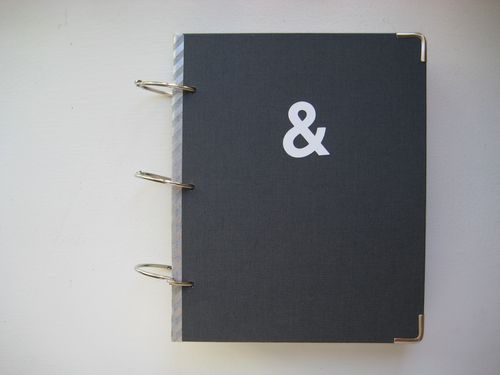
    Once you have uploaded your files through typepad, you should be able to "find" them online by typing your blog address and the PHOTONAME.jpg (EXAMPLE : "http://eliseblaha.typepad.com/minibooks.jpg" takes you to this.) That is where your image now "exists" within the internet.

    Lists

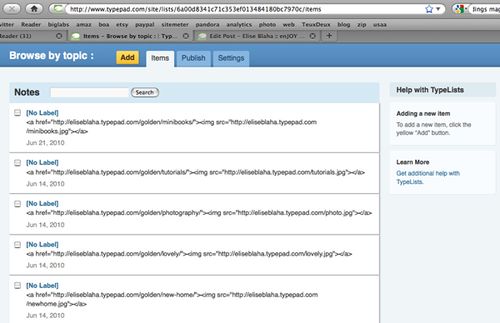
    THIRD : Create a typelist. I used the notes feature which allows you to put as much text as necessary under each item. Leave the label blank and type the following webcode into the note section :

    <a href="LINK TO WHATEVER"><img src="YOUR IMAGE ADDRESS"></a>

    OR

    <a href="http://eliseblaha.typepad.com/golden/minibooks/"><img src="http://eliseblaha.typepad.com/minibooks.jpg"></a&gt;

    And that's it. Add a different note for each button and you can get a whole sidebar made out of linkable unique images.

    If you have any questions – please ask in the comments and I will answer them there.

  • IMG_6761
    IMG_6760
    IMG_6777
    IMG_6781
    IMG_6805
    IMG_6806
    IMG_6811
    IMG_6824

    Last week, I went to Hawaii to celebrate the wedding of my best friend, Erin. Above are the few photos that I took. I can't wait to see + share the professional ones of us running through a palm tree grove.

    This wedding was extra special because Erin is half Hawaiian. Her dad lived in the islands until he was 18. So for Erin, this was more than just a destination wedding, it was a "coming home" wedding.

    I think attending a friend's wedding is even more emotional than going through my own. It was such an honor to be a bridesmaid and I am so glad I got to be there.

    Erin, I am so happy for you and David. Congratulations!

  • IMG_6885
    IMG_6886
    IMG_6874
    IMG_6879

    check plus.

    We bought my beach cruiser yesterday and quickly got it outfitted with a basket. I can't sit on it without feeling like I'm back at school on the way to class or Traddies (our on campus bar).

    I love it.

    Paul's bike (not pictured) is pretty fancy because it's doing the heavy lifting like getting him to work. Mine is for trips to the local Office Depot, the downtown post office and the library.

    Can't wait to get out and about. And don't worry, I have a legit helmet (also not pictured) for all my future rides.

  • IMG_6840
    IMG_6847
    IMG_6848IMG_6851IMG_6865IMG_6867

    Oh July.

    This has been a funny weekend, with the jet lag and the carry over of June Gloom. It’s cloudy and chilly in San Diego which made for an interesting July 4th BBQ (“do we really want to make the beer cold?”)

    But I’ve got a feeling there is sunshine on the horizon. And I know for a fact there is a new bike purchase on the agenda today.

    Paul has a rare day off from the hospital and we’re going to enjoy it.

  • IMG_6834

    Back on the mainland.

    (this photo was taken in Maui – but it could have been taken here too.)

    Looking forward to celebrating the long weekend and then jumping head first into July.

    Have a safe and happy fourth!

  • 389

    My best friend Erin is getting married on Maui on July first. I can't wait celebrate with her.

  • Meals

    We spent our first two weeks in San Diego supporting the local economy at restaurant after restaurant. It was fun for awhile, but we were so excited when we landed an apartment and the movers brought our boxes full of kitchen supplies to cook again. So excited, that we decided we'd cook for ourselves until the end of June.

    No going out to dinner, no take out, nothing.

    Above are the photos. The evidence of our challenge. It's missing a few because I went on a cruise for a bachelorette party. And because some nights I forgot the photo. (And we're ending tonight because I am going on a trip tomorrow.) But we did it. And we ate really well. We learned some great new recipes and relied heavily on some old favorites.

    As soon as Paul is back on a slightly easier rotation, I think we'll try this again.

    mosaic made with big huge labs. click to enlarge.

  • Shehejune

    They both cut their fingers on their new kitchen knives this month.

    That was lame.

    But they also finally made it to the beach.

    So that's not lame.

    He's really back to work. And his first day of his first rotation was a 16 hour shift.

    Yikes.

    She's back to work as well. And busy, busy, busy.

    They started grinding their own coffee beans. Which is a really little thing that makes a big difference.

    They are sticking to the plan of no dinners out for the whole month of June.

    It's been pretty rad for their cookbooks.

    But pretty sad for their overworked dishwasher.

    Life is good for E & P.

    San Diego is a dream come true.

  • IMG_6652

    This book was a labor of love.

    IMG_6649

    It took two and a half ink cartridges and a lot of patience.

    IMG_6711

    It follows the same basic format as our engagement album. I used the same colors, font and many of the same page layouts to put it all together. However, it's about four times as thick. I wanted to use the same size Russell + Hazel binder but quickly realized there was no way I'd fit all 104 pages in the half inch binder rings.

    IMG_6638

    So I decided to dismantle a R+H binder.

    I used an x-acto to cut the covers from the spine and then sealed the edges with washi tape. I added patterned paper to the insides of the covers and then punched three holes through them and the pages. To bind it all together, I used three 2" binder rings.

    IMG_6653
    IMG_6650

    I think the overall effect is not as clean and "perfect" looking as if I had an actual binder to case the book. However, I love the page size and am so glad I stuck with it instead of moving up to 8.5×11. I also considered separating it into a ceremony album and a reception album, but when I tried to work that out it broke up the flow of the story.

    So this is working for now. Maybe eventually I'll find a small thick binder and then I'll transfer the pages over.

    IMG_6651

    I am still looking for a suitable ampersand for the front. Right now it's just a white letter sticker, but I'd like to find a chipboard (orange) ampersand.

    IMG_6671

    I did not use any digital templates to complete this book. I just took each page at a time and worked my way through our 705 wedding photos chronologically. The final book has 175 photos. Basically, I picked my favorites and the ones that best told our story. The text that accompanies some of the photos is taken directly from my wedding wrap up posts here on this blog.

    You can read a bit about my design process (for the engagement album, but same idea) here.

    The final pages are 8.5×6.75. When I was making them in Photoshop Elements, I started with 8.5×6.75 canvases at 300dpi. I printed each page at home on 8.5×11 photo paper and then trimmed down to size. I put the pages in order and adhered them back to back (with a tape runner adhesive around each edge) before punching the holes.

    BOOK DETAILS :

    Printer : HP PhotoSmart 2575

    Photo Paper : Office Depot professional photo paper semi-gloss (highly recommend)

    Patterned Paper : Snow + Graham

    Adhesive : Tombo Mono permanent adhesive

    Paper Trimmer : Fiskars rotary trimmer

    Hole Puncher : Crop-A-Dile II Big Bite Punch

    Album : Russell + Hazel mini binder

    Typeface : Helvetica

    Photography : Lisa Welge

    I've taken photos of every spread in the book and they can be seen here. Below are 25 of my favorite layouts :

    IMG_6654
    IMG_6655
    IMG_6659
    IMG_6662
    IMG_6665
    IMG_6667
    IMG_6668
    IMG_6670
    IMG_6673
    IMG_6674
    IMG_6676
    IMG_6677
    IMG_6679
    IMG_6680
    IMG_6682
    IMG_6684
    IMG_6689
    IMG_6691
    IMG_6692
    IMG_6693
    IMG_6695
    IMG_6696
    IMG_6699
    IMG_6705
    IMG_6706

    Again, the pages above are just about half of the book – the full book can be seen here.

    Thanks so much for looking, I hope you enjoyed! Huge thank you again to Lisa + Geoff for the beautiful wedding photos.

    AND : Happy two month anniversary to Paul. This book is your present.

  • Elisecripelicense
    Film 3
    Film 4
    Film 5
    Film 9
    Film 2
    Film 1
    Film
    Film 8
    Film 7
    Film 11
    Film 6

    Whenever I open a package of film prints I promise myself I'll use film more. And then weeks and months and often years go by before I make time for it again. These are [scans of] photos from the beach, the farmer's market, our little town and around the house last weekend.

    I should do this more often.

    Maybe now that I found a developer that's quick, nearby and prints on wonderful matte paper I will.