My introduction to letterpress printing came in August 2007 when I
started working at Paper Source. We sell letterpressed invitations as
well as boxed sets of letterpressed cards. At first I was like
"ho-hum." And eventually I was like, "That is fantastic." Back in the
day, letterpress printing was the most common form of printing.
Newspapers were letterpressed. Books were letterpressed. Everything was
letterpressed. Now, it is usually just found on higher-end greeting cards and
wedding invitations (and prints and stationery and baby announcements
and business cards). It is considered more of an "art" and something
special as opposed to an everyday printing process.
I
took a beginner letterpress workshop in the spring of 2008 at a local
art studio called Pyramid Atlantic. The class was three hours on
three consecutive Saturdays and cost about $215. During the workshop, we learned
about the the process, had a chance to typeset, carved an image from a block and of course, used the presses. We learned on a
Vandercook printing press – which was originally designed to be used as
a proofing press before large runs of newspapers, etc. made it to the
larger printing machines.
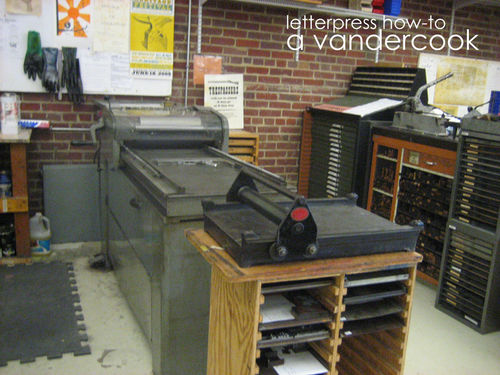

The Vandercook is
the only press that I have experience printing on. It is characterized
by a large "bed" which is where the text, plate or image is set into
place. Presses come in all sort of sizes, shapes and weights. The type
of press that I would love to own someday is called a Chandler and
Price (Pilot?) which looks like the photo directly above. The smaller ones usually weigh about 250
pounds compared to the Vandercook which weighs well over 1000 pounds.
There is a video tutorial here if you would like to see how a smaller press works as well.
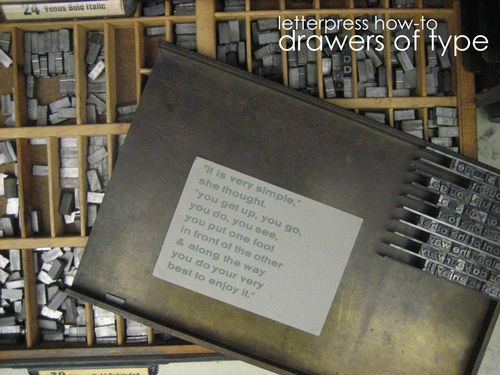
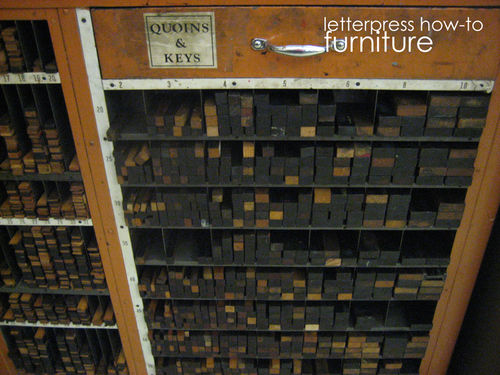
So
far, the only type of work I have done is with individual type. Pyramid
Atlantic has drawers and drawers of lead text. Each one looks very much
like this.

The drawers are divided into what is called California Job
Case style and the letters are housed in separate boxes. (The site
where the job case image is from called
it the QWERTY of the post-Gutenberg era.) Believe it or not, I am
getting good at remembering where each letter is stored.
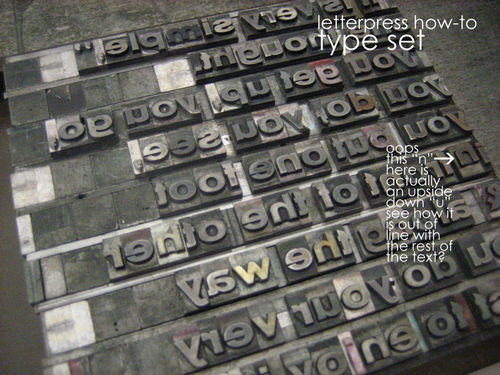
When you are
typesetting a block of text, the letters are placed in the reverse of
how they will be read on the page. Metal pieces called "slugs" divide
the lines of text. Hopefully seeing it like this explains why it is
not worth it to run a single print of anything. Too much work goes into
setting up the text. You can see above how I accidentally placed a letter "u" as an "n". "b" and "d" are also easy to mix-up. And the expression, "mind your 'p's' and 'q's'"? That comes from the letterpress days.
far, the only type of work I have done is with individual type. Pyramid
Atlantic has drawers and drawers of lead text. Each one looks very much
like this.
The drawers are divided into what is called California Job
Case style and the letters are housed in separate boxes. (The site
where the job case image is from called
it the QWERTY of the post-Gutenberg era.) Believe it or not, I am
getting good at remembering where each letter is stored.
When you are
typesetting a block of text, the letters are placed in the reverse of
how they will be read on the page. Metal pieces called "slugs" divide
the lines of text. Hopefully seeing it like this explains why it is
not worth it to run a single print of anything. Too much work goes into
setting up the text. You can see above how I accidentally placed a letter "u" as an "n". "b" and "d" are also easy to mix-up. And the expression, "mind your 'p's' and 'q's'"? That comes from the letterpress days.
My prints are made
out of handset lead type and I make stationery out of wood block
letters that I purchased on etsy. The wood letters are much larger that
the lead text but are the exact same height. Everything that sits on
the press must be "type high" so it stands above the print bed and is just
high enough to make an indent and leave a mark when the paper is rolled
on top.
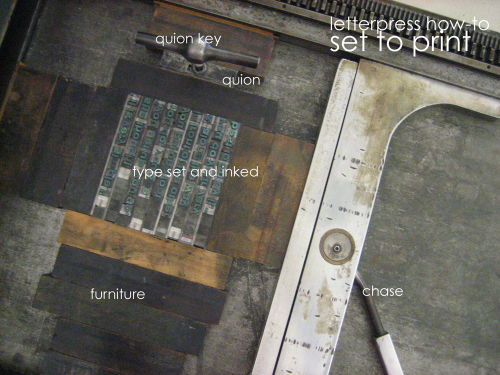
The text block is carefully transferred from the tray to the bed of the
press and then packed tightly with wood pieces called furniture. A chase
pushes up from the bottom and an expandable metal piece called a quoin is turned with a quoin key to put
pressure on the block from the side. Little pieces of copper and brass
get wedged into the text to eliminate remaining loose space. Everything
must be secure and "locked-in" to guarantee a clean image when the paper is rolled on
top.
out of handset lead type and I make stationery out of wood block
letters that I purchased on etsy. The wood letters are much larger that
the lead text but are the exact same height. Everything that sits on
the press must be "type high" so it stands above the print bed and is just
high enough to make an indent and leave a mark when the paper is rolled
on top.
The text block is carefully transferred from the tray to the bed of the
press and then packed tightly with wood pieces called furniture. A chase
pushes up from the bottom and an expandable metal piece called a quoin is turned with a quoin key to put
pressure on the block from the side. Little pieces of copper and brass
get wedged into the text to eliminate remaining loose space. Everything
must be secure and "locked-in" to guarantee a clean image when the paper is rolled on
top.
Printing can also be done using
plates. Most wedding invitations and graphics are designed in a program
like Illustrator and then emailed to a place like Owasso Graphics to
be turned into plates. I have yet to try this but I am sure I will
soon. While it seems much easier, I have not yet needed to work with
plates. The important thing to remember when ordering plates is that
you actually need the reverse of the image to be created and that the
plate should be secured on a wood block that is type high.

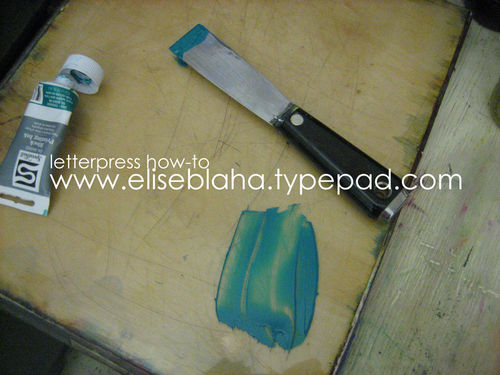
The
Vandercook that I use is electric and the ink rollers move on their own
with the flip of a switch. Currently, I use oil based printing ink
because it is easy to find locally. I would love to switch to something
rubber based or more eco-friendly. (Any brand recommendations?) I mix
the link and then spread it on to the top roller with what looks like a
putty knife. The rollers spin against each other and distribute the ink
evenly throughout the 4 other rollers (two of which will be used to ink the text).
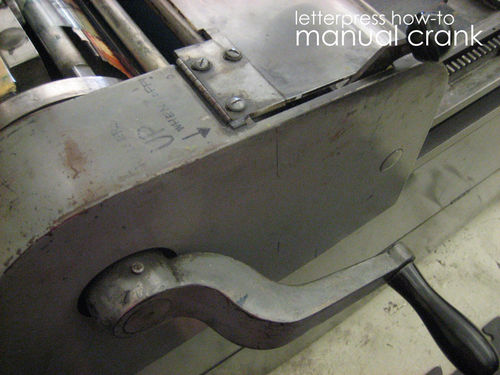
After all the set up, the actual
printing process is relatively quick and methodical. A large crank is
manually turned in "trip mode" to first apply ink the text. The crank
is turned a second time, this time in "print mode" with paper
attached to the cylinder. A quick roll brings the paper over the inked text and leaves
an impression in the paper. The paper is removed and the whole inking
and printing process starts again.
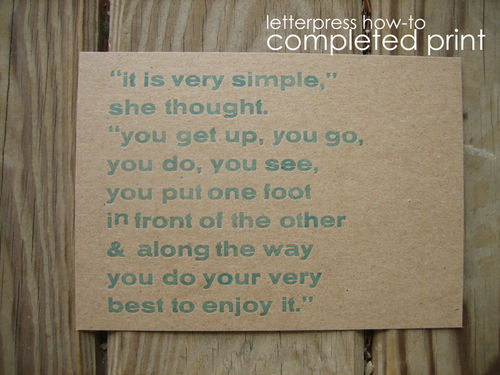
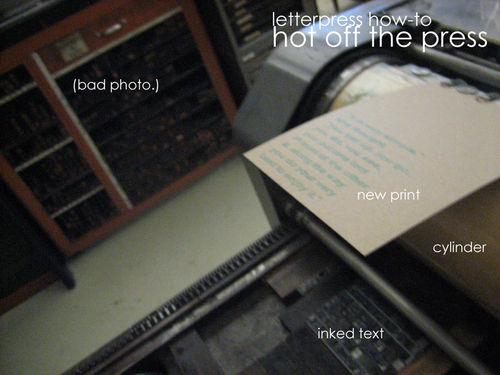
Each color
is printed in a separate run – you cannot print two colors at the same
time. For this reason, two color prints or invitations are usually
close to double the price of their single color counterparts. The above print is available here in teal and here in black.
is printed in a separate run – you cannot print two colors at the same
time. For this reason, two color prints or invitations are usually
close to double the price of their single color counterparts. The above print is available here in teal and here in black.
Letterpress
is an old printing process that seems to be experiencing a
great revival. Currently, presses for sale are antiques and usually in
need of some love. I hope that some eccentric company starts making new
presses and materials again. How cool would that be? For now, it is a
little bit of a wild goose chase to track one down and then collect all
the parts to get it up and running.
If you
are looking to try printing, I highly recommend taking a
workshop. If you are willing to travel, try taking a letterpress class
at Penland in North Carolina. To find something local, try a google search. Or look at briarpress.org which
is an online letterpress mecca. I know I am pretty lucky to be near a
rental studio. Now I just hope I am lucky enough to stumble on a press
for sale for under $2000.
Hopefully you made it
through this behemoth of a post. Please leave your questions in the
comment area and I will be sure to do a Q+A follow-up.
through this behemoth of a post. Please leave your questions in the
comment area and I will be sure to do a Q+A follow-up.

Leave a reply to brook Cancel reply