enJOY it

an archived personal and craft blog from Elise Blaha Cripe.

  • Promon1116
    It seems like every third trip I am able to hit the nail on the head and actually accomplish an album on the road. Every single vacation I plan on making something but rarely to I stick to it and make something that captures the experience. I hope our visit home to California next week for Thanksgiving is one of the good trips.

    Paul and I are flying out Thanksgiving day and my family is going over to Paul's family's for the feast. Our parents live about a mile apart so holidays are pretty easy to "share". The next day we (well me, for sure) are waking early for a little sale shopping (I'm hoping a nice digital SLR will go for pennies somewhere) and then driving to San Francisco for dinner out with Paul's aunt and uncle. We're spending the night in the city and then coming back to Sacramento for football watching. It will be a whirlwind trip and hopefully the perfect opportunity to fill this little book.

    IMG_3626
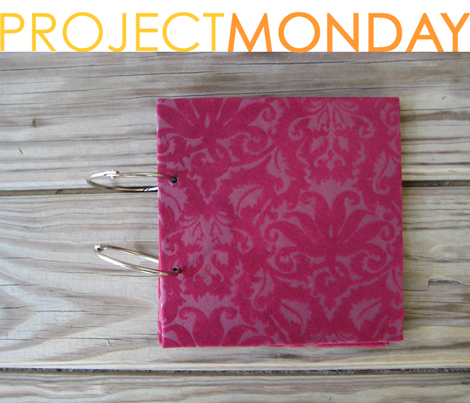
    I decided to go with a 6×6 album – a different size for me. I am hoping to take a lot of photos on the trip and afterwards lay them out in Photoshop on to a 12×12 blank canvas. I will then have them printed as 12×12 photos. Once they arrive, I'll cut down to 6×6 and add into the book. I also like the idea that 4×6 photos with fit within the covers in both portrait and landscape mode. I may add some of those as well.

    IMG_3628 
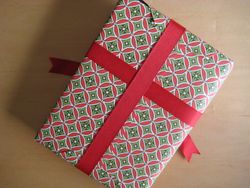
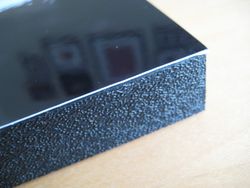
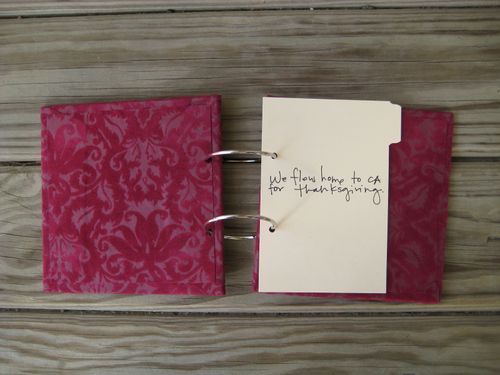
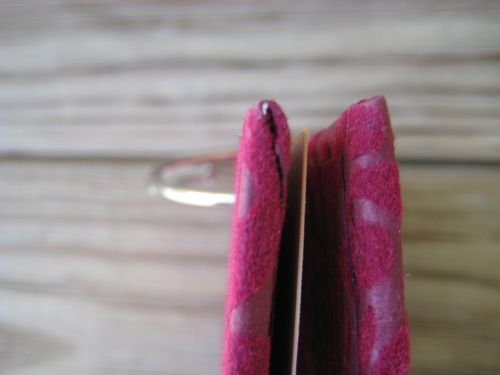
The covers of this little book are super thick. I bought bookboard, and cut it down to about 6×6 with an x-acto knife. The cut edges looked terrible (x-acto knives are not designed to cut bookboard) but they were covered up by the paper. I used bookbinding glue to attach the flocked paper to the board and wrapped each of the sides the same way that I make custom journals. To cover up where the paper was folded in, I placed a 5.5×5.5 inch square of the same paper on the inside covers.

    IMG_3627 
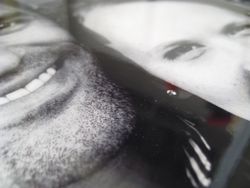
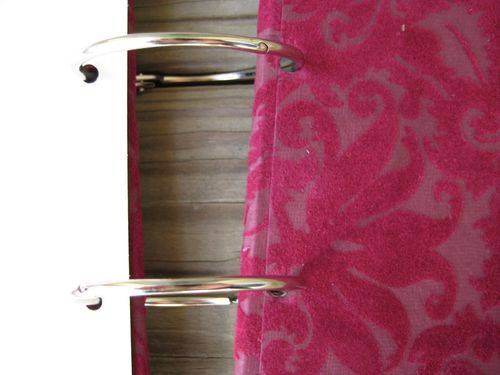
After everything was wrapped, I used my Crop-A-Dile
    to cut through the layers of paper and bookboard. This tool is my best friend and, like always, punched though everything. While on the trip, I'll use the inside card as a template for punching holes in polaroid photos and whatever else I collect.

    IMG_3625

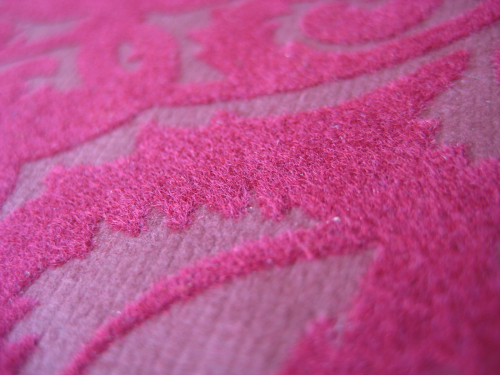
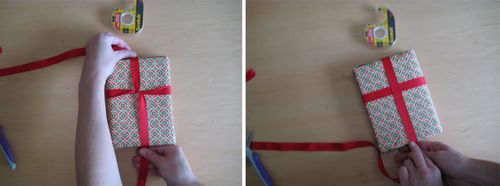
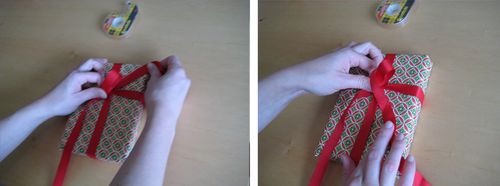
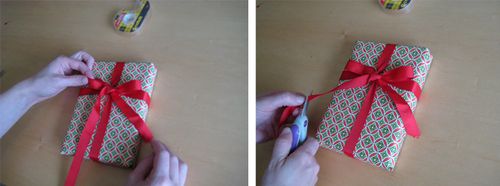
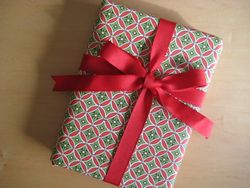
    I am obsessed with the rich texture of the paper – perfect for a festive visit. Hopefully I will fill up this travel album and not just let it go to waste… I promise to keep you posted and share the finished result this time.

  • Marthadec2

    Marthadec1

    The December Martha Stewart Living landed in my mailbox this week. Above are some of my favorite images + holiday ideas. "Joy" spelled out in lights. Initial stamped cookies. Pine cone gift tags & little elves. Craft perfect just as expected.

    Image credits : Martha Stewart

    ++

    A few other fun links from around the web :

    • I had promised myself JUST ONE calendar for 2010. But then I saw this. So now I'll have two.
    • fabric gift wrap
    • a sunlight engagement shoot with fantastic balloons.
    • I need to make these for dessert next week.
    • the third photo here motivates me to make a quilt. The whole set motivates me to find us a house.

    ++

    Can you believe we're halfway through November? I cannot. Cannot, cannot.

    I am teaching a scrapbook minibook workshop this weekend. It will by my first REAL LIFE scrapbook workshop. I'm excited. I'll let you know how it goes. Right now, I have to get to work. xo, happy weekend, elise.

  • Last March, shortly after we got engaged, I proposed bridesmaid-ship to six of my girlfriends. (You can see how I asked them here.) Since March 24th, they have been sending me fun gifts on the 24th of each month as a countdown to our wedding on April 24, 2010. It's beyond generous of them and I get so excited when sweet package arrives every month.

    One of my bridesmaids, Erin, is getting married on July 1st. We are keeping the countdown tradition alive for her wedding as well. I kicked off the gifts on November 1st with a stationery set that she and her finance, David, can use as "thank yous" for all the little things that happen between now and the wedding. Their colors are oranges and corals and reds – the wedding is taking place in Maui.

    IMG_3352 IMG_3351 IMG_3349 

    If custom stationery is something you are interested in, I have created a few listings on etsy. I was sad when the price of letterpress rental went up and I had to take down my custom letterpress stationery options. This is a good substitute for now (fingers crossed I can find my own press) and gives me a bit more freedom over the text layout and you a less expensive custom printing option. Feel free to email or convo me with questions.

    Happy Thursday and happy ampersands.

  • 007 Someday Veteran's Day is going to hit a lot closer to home for our little family. Today we are so grateful for those that are serving & sacrificing for us.

    It's a bit gray and dreary in Maryland, but we're spending the day together and have plans to go pick out our wedding bands.

  • Shopupdate1111

    A limited number will be in the shop tomorrow at 4pm EST. Minor changes to the papers will be detailed in the etsy listing images. Keep in mind that these covers are not letterpressed like the first round. Save your holiday season in a mini book.

  • IMG_3569

    Over the next few weeks I want to spend time on Tuesday talking about gift wrap ideas. Everything will be pretty simple but hopefully you'll get some fun ideas to make your packages more interesting. I am a big believer in the power of gift wrap. Real gift wrap. Complete with double sided tape & fabric ribbon.

    There are a million ways to make presents look pretty on the outside. One thing I always do is tie the bow so the back is flat. The ribbon underneath looks as neat and clean as the tied bow on top. Below are my instructions for how to tie a bow using this method. Click images to enlarge.

    Giftwrap1

    To start, give yourself a long length of ribbon. Lay it underneath your wrapped box so that the side on the right has a much longer length of ribbon. The longer side should be about 3-4 times the length of the shorter side.

    Pick up both sides of the ribbon and bring them to the front of the present and cross to opposite sides as shown in the above right image. The longer side should go "under" the shorter side when you make the crossover.

    Giftwrap2

    Create a cross in the ribbon by bringing one end down and the other up. Your longest length of ribbon should head to the top of the box.

    Holding the shorter ribbon side in place, wrap the long end around the back side of the box and bring it down to the bottom. You can see the back of the box in the right image above.

    Giftwrap3

    Turn the box back to the front and continue bringing the long side up to the center where you have made the first cross.

    Tuck the long side to the right and pull it under the cross. If your ribbon was a compass, one end would be pointed Northeast and one end would be pointing Southwest. 

    Giftwrap4

    Take the Southwest side in your left hand and make a fold (like the first bunny ear if you were tying your shoe). Fold it so it also points to the Northeast like the other end of ribbon.

    Bring the Northeast end around the folded side counter clockwise.

    Giftwrap5

    Push the end in your right hand under the first "bunny ear" and pull it tight. Give it a little bit of shaping until you have a neat bow with its two ears on the top side and its two tails neatly below

    Trim off any excess ribbon.

    IMG_3570 IMG_3571

    And TA-DA : You have a pretty package with a perfect bow on top and perfect ribbon underneath. Be sure to ask questions in the comments. This is a difficult technique to explain (even in person) but not too hard to master.

  • I was up late, late last night at Paper Source moving allll the product from the upstairs to the downstairs. It was exhausting. I'm still exhausted. But the store looks great. You should drop in and see it some time.

    I am working on getting my work figured out now.

    This week, look for : a holiday shop update (more books on the way. If you emailed/commented about wanting one, you'll hear from me soon), giveaways, a gift wrapping tutorial & an introduction of some new custom stationery.

    Lots of thoughts in my head that need to jump onto paper. More coffee. Happy Monday.

    ++

    AND THE COLOR INC GIVEAWAYS GO TO :

    12×12 Gallery wrapped canvas – #77 Tiffany L

    12×12 Standout mount – #120 Lauren

    12×12 Framed print – #161 Amy Lapi

    Congrats! Send me an email if you're a winner and I'll pass it on to Color Inc. *Don't forget you can order 25 free 4×6 prints from Color Inc with coupon code "eb09" at checkout. Try out their services…you'll be impressed.

    ++

    And check out the 24 sale happening now at Polka Dot Robot. Everything is on sale today!

  • Anthroblog

    Anthroblog3

    Anthroblog2 I can’t get enough of these pages in the current Anthropologie catalog. Craft magic. Craft heaven. They are making me so excited for the holidays.

  • It has to be said that the products I am reviewing here were sent to me for free. But it also has to be said that I would never agree to review something that I wasn't interested in buying myself. That would be awkward and unfair to everyone involved.

    Color Inc Pro Lab asked my to order three of their 12×12 photo products. I was thrilled to and used my engagement photos (taken by Lisa Welge) for each. Right now we are making space for the images to hang in our house and eventually they will sit on a guest book table or something at the wedding. As you've probably guessed, I love the engagement photos we had taken taken and love them even more in these large and stunning print processes.

    IMG_3530 IMG_3532 

    Click images to enlarge.

    The first photo went on to a gallery wrapped canvas. Canvases are available in all different sizes and this one, of course, is 12×12 inches. The image is printed on a canvas with subtle texture and stretched around the sides of the wooden frame. Your image can be seen along the edges which is a pretty cool effect. I don't know the technicalities, but it looks like the canvas is treated with a glossy coating. The gloss and the texture work great together. There is a wire on the back for hanging and the entire piece is very light. More details here (click gallery wrapped canvas).

    IMG_3535 IMG_3538 

    The next photo was produced as a standout mount. I had never heard of this before and was excited to see what it would look like. The result is the photo printed glossy (with almost a metallic sheen – it's beautiful) and then mounted a light black plastic. It has two holes on the back to hang on the wall. I love the effect of a photo that goes right to the edge without a frame. I would love to do some sort of wall collage with these – two rows of three would be really cool. You can read more about the mounting options and see pricing here (click finishing services).

    IMG_3541 IMG_3542 

    Sorry about the glare and the awkward close up – just trying to show the shiny clarity of the image!

    The last product I tried out was a photo frame for a 12×12 image. There are a variety of frame styles to choose from (click here and select photo frames) and they can be cut to many different sizes. The image comes already in the frame. It is printed on what seems to be a thick board and is treated with the glossy sheen again (not very technical, I know). There is no glass covering the frame so again, the product is really light. I keep talking about the weight of all these products because that's a big deal to me. I hate having to find a stud to hang a frame. I love that these are easy to just get on the wall where ever you please. The print quality of this image as well as the other two is just perfect. Read more here under "photo frames".

    My one last point (before we get to the huge giveaway) is I recommend creating an account with Color Inc and downloading their photo uploading software "ROES". For someone like me who is used to uploading photos to walgreens.com, it was a big change to switch to ROES. I understand why though – Color Inc is the big leagues of photo printing (and I mean that in the best way). It's fun to play with all of their options for cropping and see what products they offer. And their customer service is great if the program starts out a little confusing. Try it out. And last I checked, there was free shipping with orders over $15.

    ALSO : You can get 25 4×6 prints from Color Inc for free by entering" eb09" at checkout.

    Giveaway

    And NOW – on to the giveaways! Color Inc has generously offered to giveaway one of each of the products I tested (the 12×12 wrapped canvas, the 12×12 standout mount, and a framed 12×12) to three lucky readers. Take some time to browse the Color Inc website and then leave a comment with what you would do with your winning photo product.

    I'll draw three random winners on Monday. Have a great weekend!

  • IMG_3524
    Yesterday was a battle. The cards were stacked against me so to speak. My printer rebelled. Traffic on every road swelled. Nothing was clicking and everything felt like a mess.

    Today I woke up and have not stopped moving. In a fury of activity have been attacking the mess. I am working on making the upstairs a neat and tidy space for getting work done. Books made, packages wrapped, blog posts typed, the whole nine yards. I need a way to separate my work life from my home life which despite all odds I do not think is impossible. Moving my computer & projects upstairs and clearing some stuff out is a good start.

    Work / Life balance – I am creeping ever so slowly towards you.